Welcome to the Raspberry Pi LED Web Control STEM activity! In this hands‑on tutorial, you’ll learn how to wire an LED safely, set up a headless Raspberry Pi 5 or Raspberry Pi 4 on your iPhone hotspot, and build a single‑page web interface using Flask, HTML, CSS, and JavaScript. This project teaches core principles of electronics, web development, and the scientific method in a fun, accessible way for learners of all ages.
Materials & Safety
- Raspberry Pi 5 with Raspberry Pi OS Lite
- LED (5 mm) & 220 Ω resistor
- Breadboard & jumper wires
- Laptop/tablet for editing code
- iPhone hotspot SSID & password
Safety Tip: The GPIO pins operate at 3.3 V and are rated for around 16 mA per pin (total ≤ 50 mA) to prevent overloading the SoC and power regulator, which could cause voltage collapse or damage. Calculate the resistor using Ohm’s Law: R = (Vₛₚₚₗᵧ – Vf_LED) / I, choosing a standard resistor value in the 220–470 Ω range for typical LEDs. So, a resistor (commonly 220–470 Ω) keeps the current within safe limits by dropping excess voltage before it reaches the LED. Minors must be supervised by a qualified teacher or adult experienced in electronics to guide correct wiring, enforce safety protocols, and provide immediate assistance in case of any issues. Follow all local regulations and school policies regarding electrical experiments and safety compliance to create a responsible and secure learning environment for everyone involved.
1. Ask & Hypothesize
- Question: Can a web page turn an LED on/off remotely?
- Hypothesis: Clicking “ON” lights the LED; “OFF” turns it off .
2. Build the Circuit
- Place LED on breadboard.
- Connect resistor to LED’s anode (long leg) → GPIO 17 (BCM numbering).
- LED’s cathode (short leg) → GND pin.
- Power on the Pi and verify connections.
3. Headless Network Setup
1- On your laptop, add an empty ssh file to /boot to enable SSH on first boot .
2- In /boot/wpa_supplicant.conf, add your hotspot credentials for auto‑Wi‑Fi connection .
3- Boot the Pi and SSH in:
ssh pi@<Pi_IP_address>4- Confirm SSH is enabled via sudo raspi-config → Interface Options → SSH.
4. Code the Flask Backend
4.1- Install dependencies:
sudo apt update
sudo apt install python3-flask python3-rpi.gpio
4.2- Create app.py:
from flask import Flask
import RPi.GPIO as GPIO

GPIO.setmode(GPIO.BCM)
GPIO.setup(17, GPIO.OUT)

app = Flask(__name__)

@app.route('/on')
def on():
    GPIO.output(17, GPIO.HIGH)
    return 'LED ON'

@app.route('/off')
def off():
    GPIO.output(17, GPIO.LOW)
    return 'LED OFF'

if __name__ == '__main__':
    app.run(host='0.0.0.0', port=5000)
Flask offers a simple way to serve web routes .
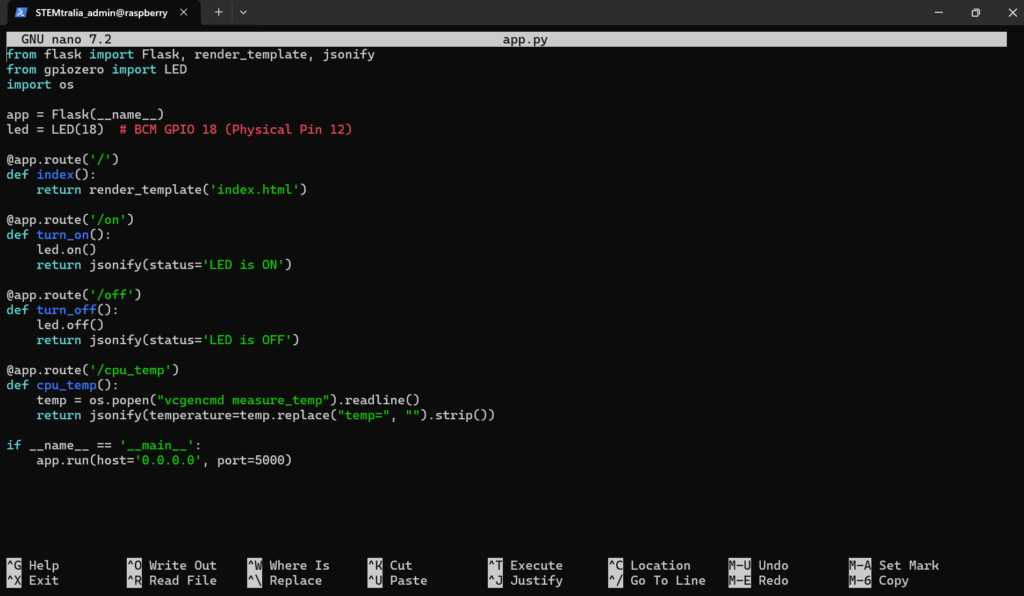
In our case, we used the Nano editor and our app.py file looks like this inside our raspberry pi:
5. Create the Web Page
Save index.html alongside app.py:
<!DOCTYPE html>
<html lang="en">
<head>
<meta charset="UTF-8">
<meta name="viewport" content="width=device-width, initial-scale=1">
<meta name="description" content="Learn Raspberry Pi LED Web Control: wire an LED, build a mobile‑friendly Flask & JavaScript interface. Fun STEM project for all ages!">
<title>STEM Raspberry Pi LED Web Control Tutorial</title>
<style>
body { font-family: sans-serif; text-align: center; padding: 2rem; }
button { font-size: 1.2rem; padding: 1rem; margin: 0.5rem; }
</style>
</head>
<body>
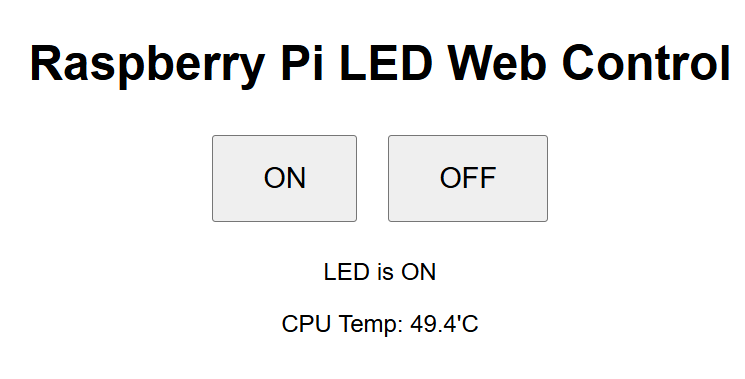
<h1>Raspberry Pi LED Web Control</h1>
<button onclick="fetch('http://<Pi_IP>:5000/on')">ON</button>
<button onclick="fetch('http://<Pi_IP>:5000/off')">OFF</button>
<script>
// JavaScript fetch() calls Flask routes to toggle GPIO .
</script>
</body>
</html>
6. Test & Observe
Open any browser on your hotspot network to http://<Pi_IP>:5000. Click ON/OFF and observe the LED. Record results and compare to your hypothesis .
7. Reflect & Extend
a. Discuss the Importance of a Resistor:
- Understand why a resistor is essential in the LED circuit to prevent excessive current that could damage the Raspberry Pi’s GPIO pins.
b. Enhance the Web Interface with LED Status:
- Modify your JavaScript code to display messages like “LED is ON” or “LED is OFF” after each action. This can be achieved using the
.then()callback in your fetch requests.
c. Monitor and Display Raspberry Pi’s Internal Parameters:
- Introduce real-time monitoring of the Raspberry Pi’s CPU temperature and display it on your web interface. This adds an educational layer, teaching users about system monitoring and data visualization.
8- Tunnel Flask App to the Internet
Use Ngrok to Tunnel Your Flask App to the Internet
Ngrok lets you create a secure, public URL that forwards to your local Raspberry Pi server.
Step 1: Install Ngrok on Your Raspberry Pi
- SSH into your Raspberry Pi.
- Run the following to install ngrok: bashCopyEdit
wget https://bin.equinox.io/c/bNyj1mQVY4c/ngrok-stable-linux-arm64.zip
unzip ngrok-stable-linux-arm64.zip
sudo mv ngrok /usr/local/bin
Step 2: Create a Free Ngrok Account
1- Go to https://ngrok.com and sign up.
2- After signup, go to your Auth token page.
3- Copy the command shown (looks like this):
ngrok config add-authtoken <your-token-here>4- Paste and run it on your Raspberry Pi.
Step 3: Start Your Flask App (if not already running)
In the same directory where app.py lives:
python3 app.pyIn our case, we did SSH into our pi and ran the python file as udner:

Step 4: Start Ngrok to Tunnel Port 5000
In a new SSH session or terminal on the Pi:
ngrok http 5000✅ You’ll now see a line something like this:
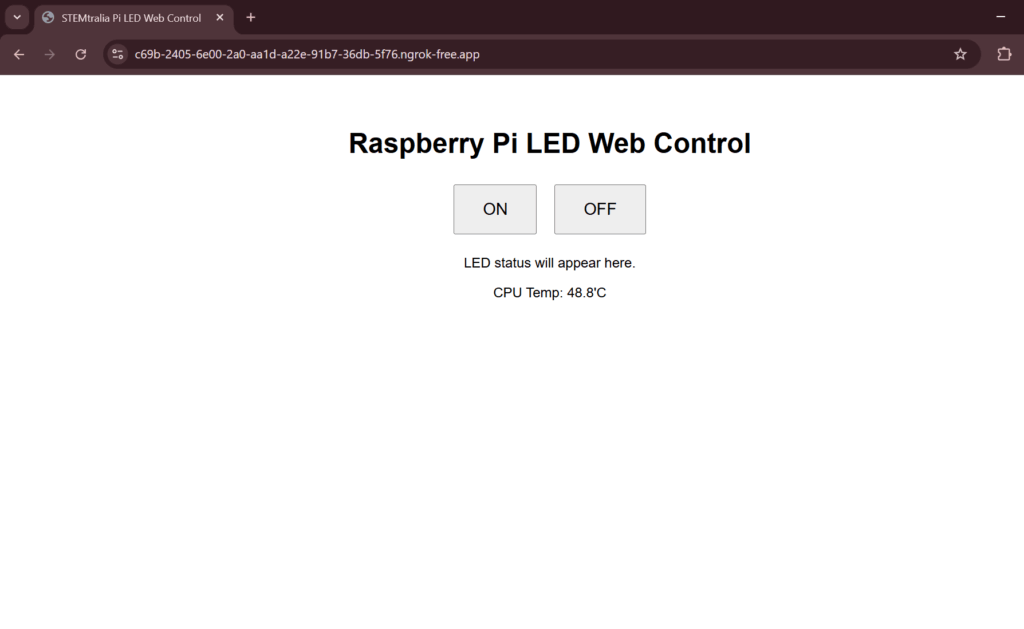
Forwarding https://c69b-2405-6e00-2a0-aa1d-a22e-91b7-36db-5f76.ngrok-free.app -> http://localhost:5000In our case, we made an account with Ngrok and we entered the command after SSH into our pi: “ngrok http 5000” to get the following URL:
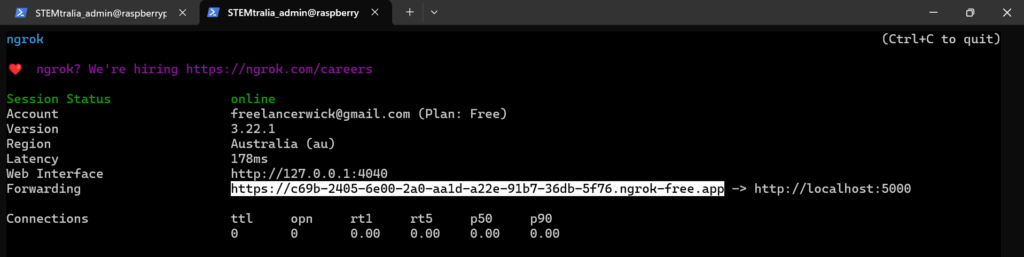
In our case, we were provided the following URL as shown above and we shared it with our friend to turn on/off the LED and read raspberry pi’s CPU temperature from Germany, and it worked well:
https://c69b-2405-6e00-2a0-aa1d-a22e-91b7-36db-5f76.ngrok-free.appand on the above URL the following screen appears first:
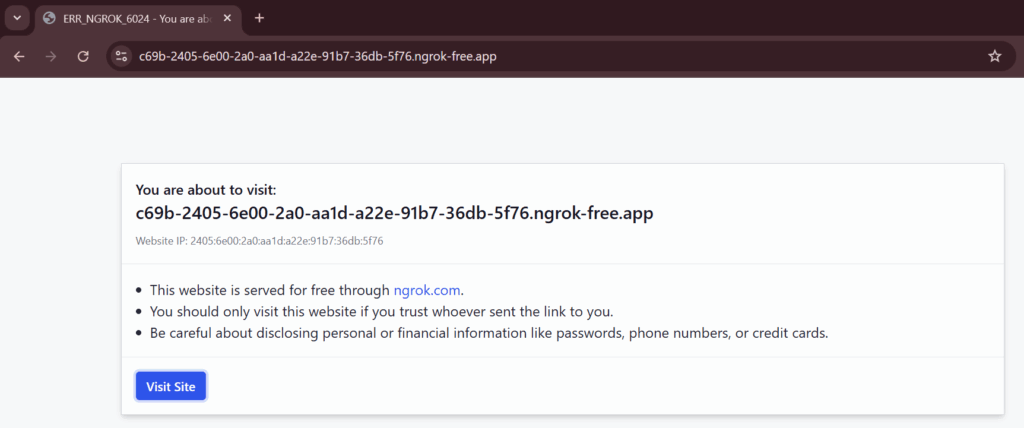
After clicking “Visit Site”, we got the following page:
✅ DONE!
- Open that
https://xxxx.ngrok-free.applink on your phone, laptop, or any device with a friend anywhere in the world. - Control your Raspberry Pi LED from anywhere in the world 🌍.
🔐 Optional: Add Password Protection to Ngrok
You can protect your link:
ngrok http -auth="user:pass" 5000🌈 Want to Go Further?
- Add a mobile-friendly UI (already responsive in your HTML).
- Use Flask + JSON API + buttons for multiple LEDs or sensors.
- Deploy permanently via Cloudflare Tunnel (zero trust).
Call us 24/7 (Mobile/ WhatsApp: +61 415 580 588) to get free troubleshooting help on this tutorial.